VpnProxy Manual
This manual will help you to install and configure VpnProxy on your network. The content is divided into four parts:
Installation
Please download the latest version of VpnProxy available at
http://www.vpnproxy.com/download/
Run VpnProxySetup.exe file on the computer where VpnProxy server should be deployed. Follow the instructions of the Setup Wizard.
VpnProxy works as Window Service. To configure the server please use VpnProxy Control Panel.
Configuring VpnProxy Server
Once VpnProxy is installed please open VpnProxy Control Panel:
Start -> Programs -> VpnProxy ->
VpnProxy Control Panel
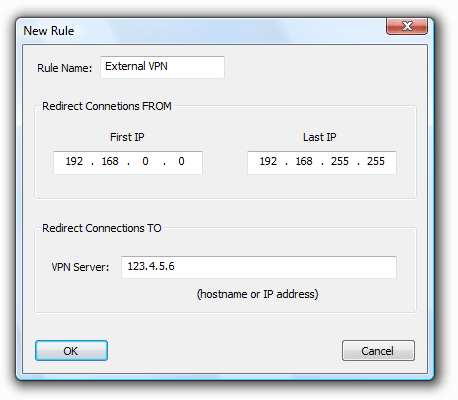
By default VpnProxy is stopped and there are no proxy rules. In order to make VpnProxy work you need to create and enable at least one rule.
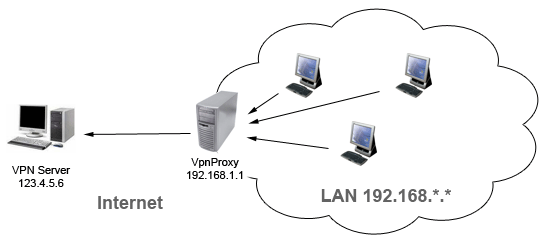
For example we want to allow LAN clients 192.168.*.* to connect to the external VPN server 123.4.5.6
To configure VpnProxy to work in the above configuration please click Add button and create the correspondent rule at the VpnProxy Control Panel:
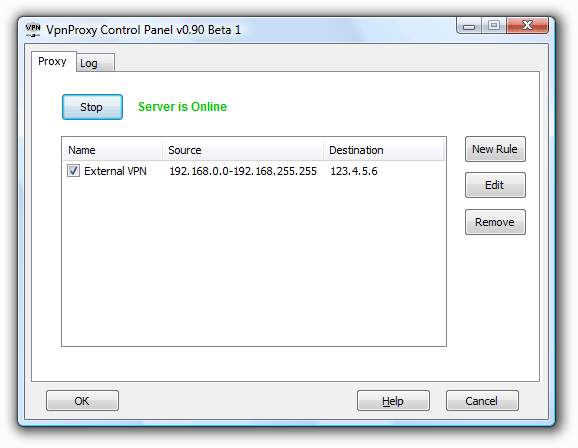
Start VpnProxy by clicking Start button. If VpnProxy is working properly the main window should look like the following:
Configuring VPN clients
You don't need any special configuration on the client side. Just replace the address of the VPN server with the address of the VpnProxy Server. (In the above example you should specify 192.168.1.1 instead of 123.4.5.6 in your VPN client.)
Working and troubleshooting
Once VpnProxy runs the Control Panel can be closed. The server is registered on the system as a Windows Service and will be started automatically if computer is rebooted.
If any problem arises - please examine Log tab and contact Support.
By default log file is located in the working directory of VpnProxy. You can change the default location using Browse button in the Log tab.